Website migration guide: how to safely move a live site

Moving a live site is fundamentally different from launching a new project. A website migration carries real operational risk: DNS changes propagate unpredictably, email can break silently, and third-party integrations can fail without warning.
Even a few minutes of downtime can mean lost revenue, damaged trust, and a drop in search visibility that takes weeks to recover from.
Most website migration guides treat moving a site as a simple checklist: copy files, update DNS, done. That works for a staging site. It doesn’t work when real visitors are hitting your existing site every second.
This guide walks you through a structured site migration process designed to protect uptime, email continuity, SEO performance, and critical integrations, before, during, and after the DNS switch. Whether you’re moving to a new hosting provider, changing domains, doing a site redesign, or restructuring your infrastructure, the goal is the same: move with control, and move safely.
Key takeaways:
- Live site migrations are risky because traffic, email, payments, and search indexing must keep working during the move.
- Most downtime happens when DNS is switched before the new environment is fully tested.
- Lowering DNS TTL 24–48 hours before the switch shortens propagation time and reduces split-traffic risk.
- Email is often overlooked—MX records can be overwritten during a nameserver change, causing messages to disappear silently.
- The safest migrations follow a staged process: audit, build and test the new environment, switch DNS, then monitor.
- For hosting-only moves, updating the A record is usually safer than switching nameservers.
What makes live site migration risky?
A live site has active dependencies, and all of them need to keep working while everything underneath changes. Visitors are loading pages. Customers are completing transactions. Email is flowing. Search engines are crawling and indexing your website’s content. Any gap in service is immediately felt.
How downtime actually happens
Most migration-related downtime comes from the DNS cutover, the moment traffic redirects from the old site to the new site. If the new environment isn’t fully tested, visitors land on a broken or incomplete page.
The propagation window
DNS propagation adds unpredictability: when you update nameservers or A records, the change doesn’t take effect instantly. During propagation, some visitors reach the new server while others still hit the old one. This split-traffic window can last from minutes to 48 hours, depending on TTL settings and ISP caching.
Example:
A customer in New York loads your checkout page on the new server, where the product catalog is current. Meanwhile, a customer in London still hits the old server, where the database hasn’t been updated in six hours. One sees correct pricing; the other sees stale data. Neither knows they’re on different servers, and you have no control over who lands where.
The cost of even brief outages
For content-driven sites, downtime disrupts crawl schedules and affects search engine traffic. Search engines that encounter errors may temporarily drop pages from google search results or delay re-indexing. For ecommerce or SaaS sites, the stakes are more immediate: failed transactions, abandoned carts, and support tickets.
A site receiving 10,000 daily visits that goes down for two hours doesn’t just lose two hours of traffic. It risks a ripple effect, including lost conversions, damaged trust, and organic traffic dips that take days to stabilize.
Email disruption during DNS changes
MX records, the DNS entries that route email, can be overwritten or misconfigured during a DNS switch. When that happens, inbound email silently fails. Messages don’t bounce; they never arrive. If your email is hosted on the same server as your website, changing hosting providers without preserving MX records can reroute email to a server that isn’t configured to handle it.
Example:
You switch nameservers on Tuesday morning but forget to recreate MX records at the new DNS provider. A client sends a signed proposal to your business email at 10 a.m. The message doesn’t bounce. No error is generated. The client assumes you received it. You have no idea it was sent. By the time you notice the gap on Wednesday, the proposal deadline has passed.
Broken integrations and third-party services
Many sites depend on external services tied to the domain or server IP: CDNs, payment gateways, CRM platforms, analytics software, and API endpoints. These integrations often rely on IP whitelists, domain verification, or webhook URLs. A migration that changes the server IP without updating these dependencies can silently break critical workflows.
DNS misconceptions that increase risk
DNS changes aren’t instant or binary. Since DNS is a distributed caching system, changes propagate at different speeds across networks. Pointing DNS to the new server isn’t the final step; it’s the most sensitive step, and should come only after the new environment is fully built, configured, and tested.
Pre-migration planning
The work before the DNS switch determines whether the migration process goes smoothly. This phase is about understanding exactly what you’re moving, where it’s connected, and what could break if something is missed. The goal: eliminate surprises before they become outages.
Audit your current hosting and DNS setup
Start with a thorough site audit. Document your server environment:
- OS, PHP version, database version, and server-level modules
- All DNS records: A, CNAME, MX, TXT (including SPF and DKIM)
- Current IP addresses and nameservers
- CDN configuration and caching rules
- SSL certificate type: Let’s Encrypt auto-renewal, provider-issued, or custom
Watch for these common audit gaps:
- PHP version mismatch (such as moving from PHP 8.1 to 7.4) → errors surface only after the switch, when real visitors are already hitting the new server
- Missing DNS record → silent failure of the service that depends on it
- Missing or expired SSL → browser security warnings the moment DNS resolves to the new IP
Confirm the new hosting service supports your SSL setup and plan for provisioning a new certificate before switching traffic.
Inventory email and third-party integrations
This step catches dependencies most checklists overlook:
- Email hosting — If it runs on the same server as your website, migrating without preserving MX records will break delivery. If email is external (Google Workspace, Microsoft 365), verify MX, SPF, DKIM, and DMARC records are documented.
- Payment gateways — Webhook URLs tied to your domain (Stripe, PayPal).
- CRM and marketing tools — Domain-based authentication, API keys linked to endpoints.
- Analytics tracking — Scripts like Google Analytics, tracking pixels, tag managers.
- API connections — Services using IP-based whitelisting need updating before the switch.
Document everything in a spreadsheet: each service, its connection method, and what needs updating. This is your migration plan for dependencies.
Lower DNS TTL in advance
TTL (Time to Live) tells resolvers how long to cache a DNS record. A default TTL of 86400 means resolvers may serve the old IP for up to 24 hours after a change.
Recommended TTL: 300 seconds (five minutes), set at least 24–48 hours before the planned DNS switch.
This preparatory window lets the old TTL expire across networks, so when you make the actual change, most resolvers pick up the new IP quickly.
Example:
You lower TTL to 300 on Monday and switch DNS on Wednesday. The old 24-hour TTL has long expired, so resolvers worldwide pick up the new IP within minutes. Compare that to lowering TTL and switching DNS on the same day: most resolvers are still caching the old value, and propagation drags on for hours with traffic splitting unpredictably between servers.
Create a full backup
Always create a complete backup, this is your rollback safety net:
- All website files via SFTP or SSH, including hidden directories and configuration files
- Full MySQL database dump
- Mailboxes, if email is hosted on the same server
- Store everything independently of both old and new hosting environments
For WordPress or any content management system, verify the export is complete by checking file size and table counts.
Technical migration steps
Nothing in this phase should affect your current site. DNS still points to the old server. Visitors, search engines, and email all continue operating normally. The goal is to build a fully functional copy of your site on the new environment and verify it works before touching DNS.
1. Transfer website files
Upload the entire site to the new host. You can do this via the File Manager, SFTP or SSH. Preserve the original site structure exactly; changing paths or renaming folders breaks internal references and hardcoded paths.
After upload, verify the transfer:
- Compare file counts and directory sizes between source and destination
- Confirm hidden files (like .htaccess) transferred correctly
- Check that file permissions were preserved
A missing configuration file or an incomplete upload is easy to catch now and painful to troubleshoot after DNS has switched.
2. Export and import the database
Export using a full MySQL dump that captures all tables, views, and stored procedures. On the new server, create a fresh database and user with correct privileges, then import. For large databases, command-line import via SSH is usually more reliable than browser tools.
Verify data integrity: check that table counts match, that key content is present, and that no import errors were logged. A partial import produces a site that loads but fails silently on checkout, login, or content rendering.
3. Update configuration files
Connect files and database by updating the configuration file (wp-config.php for WordPress):
- Database name, username, password, and host → new server’s credentials
- File paths, temporary directories, caching configurations → new environment
- .env file or multi-environment profile → new server’s resources
- Secondary config files → check for hardcoded paths or server-specific variables
4. Update URLs (if needed)
If domain changes are involved, moving from an old domain to a new domain, update all URLs stored in the database. For WordPress and similar platforms, internal links, image paths, and serialized data store the full domain.
Even if the domain stays the same, check for hardcoded server IPs or CDN paths in templates and plugin settings. The new site should be entirely self-contained, with no lingering dependencies on the old host.
5. Test before the DNS switch
This is the most important step. Preview the site using a temporary URL from your hosting company, or modify your local hosts file to point the domain to the new server’s IP (more accurate, since it tests SSL validation and cookie handling).
Test everything:
- Submit forms and confirm delivery
- Log in to admin areas and verify access
- Walk through checkout end to end
- Load media-heavy pages and verify all assets render
- Remove any password protection used during setup
- Confirm SSL shows a valid certificate with no mixed content warnings
When you change DNS, the only thing that should change for visitors is which server responds.
How to change DNS without downtime
DNS is where most migration risk concentrates. Every step up to this point has been preparation: building and verifying the new environment while the live site continues running untouched. Now, traffic needs to move from one server to the other.
Nameserver switch vs. A record update
| Nameserver switch | A record update | |
| What changes | DNS authority for the entire domain. All records (A, MX, CNAME, TXT) move to the new provider. | Only the IP address the domain points to. All other records stay at the current DNS provider. |
| Risk level | Higher: every record transitions at once. Any missing record breaks its associated service. | Lower: isolates the change to the web server. Email and other services remain unaffected. |
| Best for | Full infrastructure moves where DNS management is also migrating. | Hosting-only migrations where DNS provider, email, and third-party services stay the same. |
| Prerequisite | Every DNS record must be correctly recreated at the new provider before switching. | Only the new server IP is needed. |
If your migration only involves changing hosting providers, and DNS, email, and third-party services stay the same, an A record update is the safer choice.
Choosing the right cutover method
- Hosting-only migration: Update the A record (and AAAA for IPv6) to the new server’s IP. Most contained change.
- Full infrastructure move: Nameserver switch required. Recreate all records at the destination, verify MX, SPF, DKIM, CNAME, and TXT records before switching.
- Domain change: Beyond DNS, you need 301 redirects from old URLs to corresponding new URLs, updates to Google Search Console, analytics tracking, and external links. The old domain should remain active and redirecting to preserve ranking signals and search engine trust.
Example:
An agency migrating a client’s WordPress site from one host to another, with the same domain and external email, only needs an A record update. A business moving its entire infrastructure to a new provider, including DNS management, requires a nameserver switch with every record rebuilt first. A company rebranding under a new domain needs both a DNS change and a full 301 redirect map, plus updates to Google Search Console, analytics, and directory listings.
Sequencing the change
Execute during your lowest-traffic window. If you lowered TTL in advance, most resolvers pick up the change within minutes to hours.
Keep the old server running; don’t cancel the current hosting provider or delete anything until propagation is confirmed complete. Keep the old environment available for at least 48–72 hours.
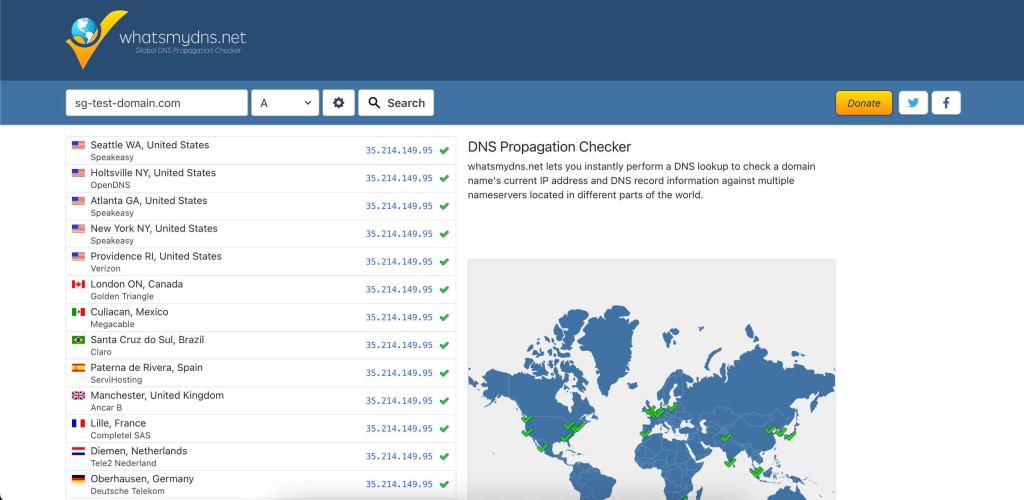
Monitor incoming traffic on the new server. If it shows zero traffic while analytics still reports visitors, something is wrong. Use a DNS propagation checker to see which regions have resolved to the new IP.
Protecting email and critical services
DNS changes don’t just affect your website. They affect every service that depends on your domain’s DNS records, and email is the most common casualty. Payment gateways, CDN configurations, and API integrations are close behind.
MX records and email continuity
When MX records are misconfigured during a nameserver switch, inbound messages disappear without a bounce or error. This can go undetected for days.
- If you’re updating only the A record, MX records stay untouched.
- If a nameserver change is necessary, verify MX records at the new provider before switching: same priority values, same mail server hostnames.
After the DNS change, test email in both directions:
- Inbound: Send a message to your domain from an external address → confirm it arrives
- Outbound: Send a message from your domain → verify delivery, check it doesn’t land in spam
- Authentication: Inspect message headers for SPF, DKIM, and DMARC → confirm all resolve correctly
Consider separating email from web hosting entirely to eliminate this risk for future migrations.
CDN, payment gateways, and API integrations
- CDN — Update the origin IP to the new server and purge the cache entirely.
- Payment gateways — Verify webhooks still process. A failed webhook may let orders appear complete on the frontend while the backend never receives confirmation.
- CRM and API services — Update IP whitelists and domain verification.
Example:
A WooCommerce store migrates to a new server. The site loads perfectly. A customer adds a product to their cart, checks out, and sees “Order confirmed.” But the Stripe webhook URL still points to the old server’s IP, which is no longer processing requests. Stripe never confirms the payment on the backend. No shipping notification is triggered. The store owner doesn’t notice until the customer emails support two days later asking where their order is.
These failures are quiet. They surface in transaction logs, missed notifications, and customer complaints, often well after the migration is considered complete. Proactive verification before and immediately after the DNS change is the only reliable way to catch them.
Post-migration monitoring
Once DNS changes are live, the migration enters its most critical observation window. The new server is now receiving real traffic, handling real transactions, and serving real visitors. Active monitoring in the first 24 to 72 hours is what separates a successful migration from one that creates problems that compound silently.
Uptime and error monitoring
Set up uptime monitoring before the DNS switch, with checks every one to five minutes. Watch server logs for:
- 500-series errors — server-side failures, misconfigured settings, missing dependencies
- 404s on key pages — broken links, missing files, redirect rules that didn’t transfer
Monitor the old server in parallel: declining traffic there and increasing traffic on the new one confirms propagation is progressing.
Functional testing
Walk through every critical path on the production domain, not the temporary URL or local hosts file:
- Submit forms and confirm delivery to the correct inbox
- Log in / log out of user accounts and admin areas
- Complete a transaction end to end: cart, checkout, payment, order confirmation
- Verify transactional emails fire: password resets, order confirmations, shipping notifications
- If you use an SMTP relay (SendGrid, Mailgun), confirm the connection is intact
- Test across devices and browsers
SEO signals to verify
- 301 redirects — Every old URL should reach its final destination URL, not the homepage or a 404. Avoid redirect chains; collapse them into single hops.
- XML sitemap — Resubmit through Google Search Console (add and verify the new domain property if the domain changed). Monitor Index Coverage for errors across all the pages and all the URLs.
- Canonical tags — Confirm key pages reference the correct URLs on the migrated site.
- Google Analytics — Verify it fires correctly. Compare real-time data with your pre-migration baseline. A drop in sessions may indicate a tracking code issue.
- Crawler activity — Review server logs to ensure search engines access your pages and receive 200 responses. Check that meta descriptions and other on-page elements render correctly.
Post-migration monitoring isn’t a one-day task. Keep watching search console, analytics, and your site’s performance for at least 30 days. SEO recovery, even from a successful website migration, takes time as search engines recrawl, reindex, and recalculate your site’s rankings.
Don’t want to handle the migration yourself?
Get a free website migration from SiteGround and let our experts move your site for you.

Common website migration mistakes
| Mistake | Why it causes damage |
| Changing DNS before testing | Once DNS points to the new server, real visitors land there immediately. If the site is broken, every minute spent troubleshooting is a minute of downtime. Always test on the new website before touching DNS. |
| Overwriting MX records | A nameserver switch replaces your entire DNS zone. If MX records weren’t recreated, email stops silently with no bounce or error notification. |
| Migrating during peak hours | Maximum visitors affected during propagation delays. Maximum pressure to fix issues quickly, increasing the chance of compounding one mistake with another. |
| Ignoring third-party integrations | A site that loads doesn’t mean every service behind it works. Payment gateways, CRM webhooks, CDN origins, and API connections can all fail silently when the server IP changes. |
| Skipping post-migration testing | Forms, checkout, transactional emails, and analytics all need active verification. A migration is complete when every service is confirmed working, not when the page loads. |
| Forgetting to lower TTL | High TTL means slow, unpredictable propagation with split traffic across two environments. How many URLs resolve to which server becomes uncontrollable. |
| Deleting the old server too early | Some resolvers hold cached records longer than expected. Keep the old environment running 48–72 hours minimum as a fallback. |
Website migration checklist
Pre-migration
- Audit hosting and DNS: document server environment, all DNS records, IPs, SSL, CDN config. Run a site audit to baseline site speed and page speed.
- Inventory email and integrations: confirm hosting, list services, note dependencies. Check for broken links and update links to other sites where possible.
- Lower TTL to 300s, 24–48 hours before the switch.
- Back up files, database, email, and store off-server. Confirm all your pages, including new pages and existing content, are captured. Verify how many URLs and website’s URLs need migrating. Review URL structure and website architecture of the existing site.
Migration
- Transfer files. Preserve structure and permissions.
- Import database. Verify integrity.
- Update config files for the new server.
- Run serialization-safe search-and-replace if changing domains. Handle old URLs mapping to new URLs.
- Test on new server: forms, login, checkout, media, SSL. Verify the staging site matches the existing website. Check internal links, incoming links, and that the entire site functions. Confirm technical SEO elements are intact.
DNS cutover
- Execute during low-traffic window.
- Verify all records, especially MX and TXT.
- Confirm the solid plan for domain changes or URL changes is in place.
Post-migration
- Monitor uptime, server logs, traffic distribution.
- Test all critical functions on production: forms, transactions, login, emails.
- Verify email delivery including SPF, DKIM, DMARC.
- Confirm SEO signals: 301 redirects (with the same page mapping correctly), XML sitemap resubmission via search console, canonical tags, analytics tracking. Verify google search indexing and that search engines access all the URLs.
- Review site’s performance, page speed, and search engine traffic recovery.
- Keep the old server running 48–72 hours minimum. A successful site migration, and truly successful migration, means every service confirmed working.
Final thoughts
A website migration doesn’t have to be high-risk. The downtime and broken email people associate with migrations result from skipped steps and poor sequencing, not inherent complexity.
When the website migration process is staged correctly (audit, build, test, switch, verify), each phase reduces risk. DNS isn’t a leap of faith. It’s a controlled handoff after the destination is confirmed ready.
The core principle: never send live traffic to an environment you haven’t tested. The planning phase eliminates unknowns. The migration phase builds a verified copy. The DNS switch moves traffic only when ready. And post-migration monitoring catches anything that slipped through.
Whether you’re moving to a new hosting service, changing domains, or consolidating infrastructure, the steps should always be the same: map dependencies, prepare the destination, control the cutover, and verify the result. That’s how you achieve a smooth site migration and protect uptime, search visibility, and the services your site depends on.
Migration is a process, not a moment. Treat it that way, and the risk drops to nearly zero.


Comments ( 0 )
Thanks! Your comment will be held for moderation and will be shortly published, if it is related to this blog article. Comments for support inquiries or issues will not be published, if you have such please report it through our official channels of communication.
Leave a comment
Thanks! Your comment will be held for moderation and will be shortly published, if it is related to this blog article. Comments for support inquiries or issues will not be published, if you have such please report it through our official channels of communication.